Pantry Overhaul (How I Accidentally Became the Bob Ross of Canned Goods)
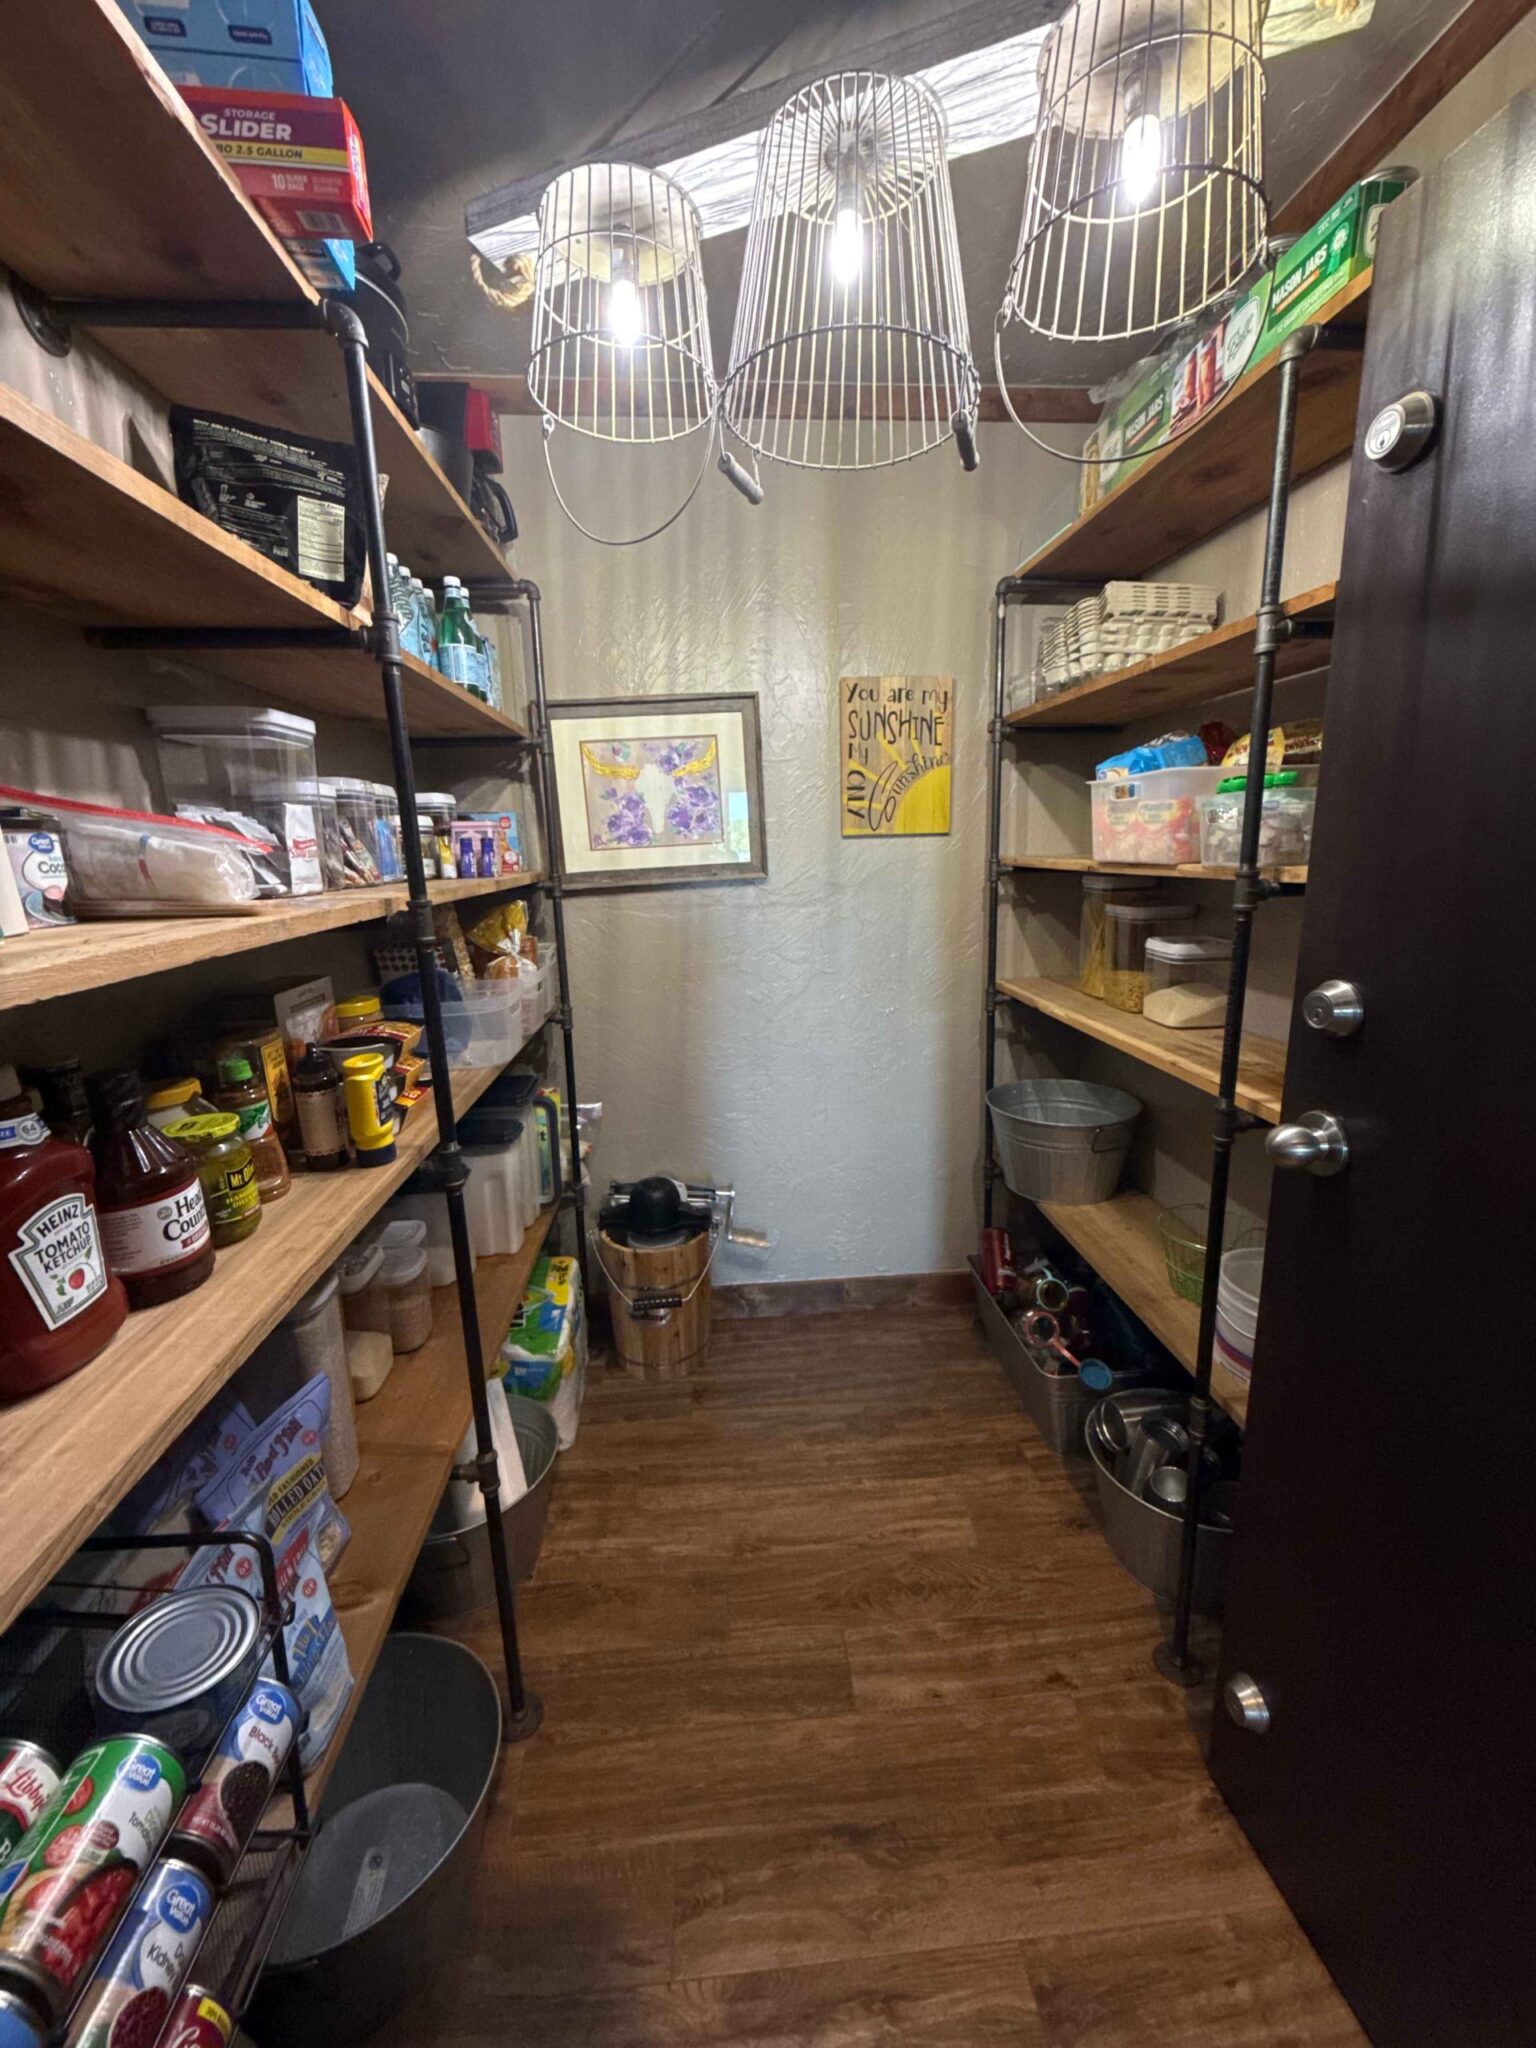
Let’s Talk About That Hot Mess You Call a Pantry
If opening your pantry door feels like triggering a game of Jenga you never signed up for, you’re not alone. We’ve all got that one rogue can of black beans from 2018, a mystery sauce we swore we’d use, and enough random pasta shapes to recreate an art museum.
It’s time. Time to take back your pantry, one shelf (and questionable condiment) at a time.
But wait — we’re not just organizing. Oh no. We’re going full color-drenched masterpiece, baby. Walls, ceiling, the whole mood. (Well… almost the whole thing. I’ll explain in a minute.)
Step 1: Take Everything Out
No, really. Everything. Yes, even the sad box of crackers you’ve been emotionally avoiding since 2020.
Lay it all out so you can get a full visual of the chaos you’ve been unknowingly hoarding. This is the part where you’ll discover:
- Four open bags of brown sugar
- A mountain of plastic bags you “might need someday”
- Enough spices to open a food truck
Celebrate this moment of honesty. It’s about to get better.
Step 2: Clean Like Your Mother-in-Law is Coming Over (Yes, Even the Walls)
Wipe the shelves. Vacuum the corners. And then—this is important—wash the walls. I know, I know. You’re thinking, “Why would the walls of a pantry be dirty?” Well, if you have kids, you already know. Somehow they manage to splatter food in a closed space where they barely spend any time. It’s a mystery science still can’t explain.
Grab a bucket of warm soapy water (or your favorite degreaser spray), and go to town. Crusty smudges, mystery smears, spaghetti sauce streaks—gone. This step is especially key if you’re planning to paint. Clean walls mean better paint adhesion and a smoother finish.
If your pantry has a light fixture and it’s dim or yellowing, replace the bulb — or better yet, install a motion sensor light and pretend you’re a high-end chef every time it turns on.
Now take a good look. It’s clean. It’s empty. It’s basically a blank canvas…
Step 3: Paint That Sucker — But Respect the Trim, Obviously
I decided to go bold and give this tiny space the full color-drenched treatment — meaning walls and ceiling, all the same color, for a cozy, dramatic vibe that feels way fancier than it is.
I chose Tony Taupe by Sherwin Williams — a warm, moody neutral that feels grounded and calming but still elevated. Like the pantry equivalent of a cashmere throw blanket.
But let’s be clear: I did not paint the trim. It’s wood, it’s beautiful, and I’m not a monster. Some things are sacred, and painting over natural wood is where I draw the line. So the original trim stays — and honestly, the contrast ended up looking kind of stunning. Like a little design flex, but for people who know better.
🎨 Want to see the exact brushes, tape, and paint tools I used? Check out my Painter’s Must-Haves here.
Make your life easier and avoid the mid-project meltdown (you know the one). These are the tools that helped me survive this project without cursing out a paint tray.
Step 4: Ruthlessly Declutter
As the paint dries and you feel artistically reborn, turn to your pile of food and stuff. Here’s what to ask yourself:
- Is it expired? Toss it.
- Do I even cook with this? Donate it.
- Does this bring me joy? Okay, Marie Kondo, calm down, but seriously — if you haven’t touched it in 6 months, it can probably go.
Sort into categories: baking, snacks, grains, canned goods, spices, random guilt purchases, etc.
Step 5: Put it All Back (Like a Person Who Has Their Life Together)
You’ve done the hard part. Now it’s time to pretend you’re a Pinterest mom for 20 minutes.
- Use clear containers for dry goods so you can see what’s inside (and feel smug about it).
- Label everything. This helps you, your partner, your kids, and even future-you who will inevitably forget where the rice lives.
- Use baskets or bins for categories — snacks, baking, breakfast stuff, etc.
- Use lazy Susans for sauces and oils (so they stop migrating to the back of the shelf and ghosting you).
- Add shelf risers for canned goods so you can actually see them all.
Don’t overthink it. Progress over perfection, always.
Optional: Add a Door Organizer, Wallpaper, or a Little Shelf for Sanity
Go nuts. This is your pantry glow-up. Add a small chalkboard to jot down what you’re out of. Hang a tiny art print. Stick a motion-sensor light strip under each shelf and bask in your pantry’s dramatic beauty.
Final Thoughts: You Deserve a Pantry That Doesn’t Judge You
Listen, this isn’t just about organization. It’s about you — reclaiming space, finding joy in the everyday, and maybe just painting a tiny room like it’s a fancy European café.
If nothing else, you’ll at least know where the freaking granola bars are now.
Go forth, hot mess. Drench it in taupe. Respect the trim. Rule your pantry kingdom.